This tutorial is for those of you who want to go the extra step and ensure reliable system email delivery, by sending them out via a reliable server (in this case we use Amazon SES – Simple Email Service, but we’ll add guides for others such as SendGrid, MailGun etc. in due course).
Why you might want to use Amazon SES for your Jetpack CRM Email Delivery:
- More reliable (especially at scale) than your typical hosting webmail
- Sends from an SMTP server, not your local server (which is more likely to be marked as spam by a receiving party)
- Jetpack CRM is sending out hundreds, or thousands of emails a day for you
How to use Amazon SES with Jetpack CRM
This guide covers basic SES setup and then entering the SES details in Jetpack CRM. Before you get started you’ll need an Amazon Web Services account, if you don’t have one you can get one by registering with AWS here. You will also need to change DNS settings, or ask your hosting provider to do this for you – so you’ll need access to whatever control panel your hosting provider uses.
Step 1) Enabling SES for your domain
1.1) Go to the AWS Console
Log into your AWS Management Console (here’s the link). Once logged in, you should see a screen like this, (As at June 2018):
1.2) Load Simple Email Service (SES)
Type SES or Simple Email Service into the services box, or Find it from the list of services on the page.
Here’s what SES should look like when you’re there:
1.3) Verify Domain or Email Address
Once in SES you can choose either Domains or Email Addresses from under the heading ‘Identity Management’. What we’re going to do here is confirm with AWS that we have the right to send email from an address or domain.
To be really thorough, you could add your domain name AND email address, but roughly speaking here’re the two specific scenarios:
Domains: If you’re sending from multiple *@yourdomain.com email addresses, e.g. office@yourdomain.com and john@yourdomain.com etc.
Email Addresses: If you’re only sending out from one email address you can simply add it in here.
The process is simple, we’ll go through both here, so please follow along depending on your choice for the above:
1.3.1) Verifying a Domain to send email from SES
Click “Identity Management -> Domains” then hit the blue ‘Verify a New Domain’ button.
You’ll get a pop-up which asks you for the domain name. If you look at the following example I’ve filled it out for my book company, and checked “Generate DKIM Settings”.
What is DKIM?
Setting up DKIM as we do here, is like your current domain provider ‘handing over the keys’ to Amazon Web Services, and saying ‘it’s okay to send mail on our behalf’. Completing this step is very important for quality in mail delivery.
Click ‘Verify This Domain’
Next you’ll be given the DKIM data, which may seem overwhelming, but really it’s quite simple once you know what you’re doing. (Follow along below):
There are 2 steps you now need to complete:
Step 1 Verifying a domain) Add TXT record to your domain’s DNS Settings
Step 2 Verifying a domain) Add CNAME records to your domain’s DNS Settings.
While Amazon says step 2 is optional, we highly recommend it – this makes for a MUCH better deliverability of your emails.
For this tutorial you can ignore the additional step AWS mentions ‘for receiving emails only’.
Here’s an example of the DKIM page:
1.3.2) Adding DNS Records for Domain
This step will be different depending on which hosting provider or server company you use. Ultimately, you could just email them saying this:
I need to update my DNS records for the domain *YOURDOMAINHERE* as follows:
Add TXT record:
* Copy from Amazon page as screenshot above *
Add 3 CNAME records:
* Copy from Amazon page as screenshot above *
Can you do that for me please?
… most decent server hosting companies will ‘just do it for you’, (you could even just screenshot the AWS page with the details and include that). However, for illustration purposes, I’ll include what I did for this domain in 1and1‘s control panel:
Adding to the DNS, 1and1, an example:
After Loading ‘Domains’ I clicked on the domain, then edit DNS, then edited as follows:
Click Add Record:
Select ‘TXT’ for type, and enter the details as per Amazon page:
Select ‘CNAME’ for type, and enter the details as per Amazon page (you need to do this for the 3 different settings)
… After you’ve added those 1-4 DNS settings, you can go back to your AWS Console -> SES -> Domains and you should see something like the following:
… this shows you that the domain hasn’t been verified yet. It can take DNS changes 5 seconds to 5 hours to proliferate through the networks! (Mostly it takes 5 minutes for a good service!) – until that happens this’ll show up as ‘Pending Verification’ – don’t worry, put this to the side and check back later. Note: Amazon itself says it can take ‘up to 72 hours’ for this to come through, so bear that in mind.
Once verified, you will be able to send email out from this domain reliably. (See below on generating your SMTP details.)
1.3.1) Verifying an Email Address on SES
As well as, or instead of, verifying a domain name with Amazon SES, you can also verify an email address. This step is simpler than verifying a domain, but does not allow the flexibility of easily adding more domains later, and is arguably a little less refined (and so may mean slightly lower deliverability for your emails).
Click “Identity Management -> Email Addresses” then hit the blue ‘Verify a New Email Address’ button.
Next you’ll see a pop-up. This is an easy one – enter the email address you want to use with Amazon SES.
Enter your email, and hit ‘Verify this email address’:
Amazon will then send you an email to that address to verify your identity/confirm they can send on your behalf:
Here’s what the email looked like for us, all you have to do here is click the link:
… Once you’ve clicked the link, you should be able to see the email as ‘verified’ in your ‘Email Addresses’ under Identity Management in the AWS SES dashboard:
So now you’re Good to Go!
2) Generating your SMTP Credentials
After you’ve verified a domain and/or email address, you are ready to send emails through SES. (Also see note below on scale & billing.)
To tell Jetpack CRM to send out emails through our new SES gateway we need SMTP credentials. You can get these from the AWS SES management console under “Email Sending -> SMTP Credentials”:
Once on the above page, first copy out your Server Name to somewhere safe (we need that later on), then simply click ‘Create my SMTP Credentials’.
… and on the next page click ‘Create’:
That’s it! Copy down the Username and Password from this page for using in your Jetpack CRM Mail Delivery Wizard:
So if all has gone well, you’ll now have the following from your Amazon SES setup:
- Verified Domain and/or Email
- SMTP Server Name (from the start of step 2)
- SMTP Username and Password (from the last step)
That’s all you need from Amazon SES, but please read the following note before proceeding to add these into Jetpack CRM:
If you are using Amazon Web Services for the first time, sometimes they ‘limit’ your email sending (sandbox you). If this has happened to you the service will restrict you from sending out more than 5 emails a day.
To check this, simply go to the AWS SES dashboard and click ‘Sending Statistics’ under ‘Email Sending’:
This is our dashboard, and as you can see it tells us our limit is 50k emails a day (so we’re not sandboxed). But sometimes first-time users see a message here saying ‘your email has been restricted’ or similar. If you get this you may have to either 1) add a credit card to the account (under Billing, from your name menu at the top right) or 2) fill out a form for them telling Amazon what you’re going to be sending out (verifying you’re not a spammer). This is usually an easy process, but worth noting if you’re having issues sending out and are early to AWS.
3) Adding SES Credentials into Jetpack CRM
So you now have SES setup, and you’ve copied down your details. All that’s left is to add them into Jetpack CRM.
To do that you can follow this guide, or simply go into ‘Jetpack CRM Settings -> Mail Delivery’ and add a new Mail Delivery method, entering your name and email (as you’ve set up with Amazon above) in the first dialog, then on the second enter your details from AWS SES.
Here’s an example of how ours looked (Note, do not share your details with anyone, they’re the keys to your email address!):
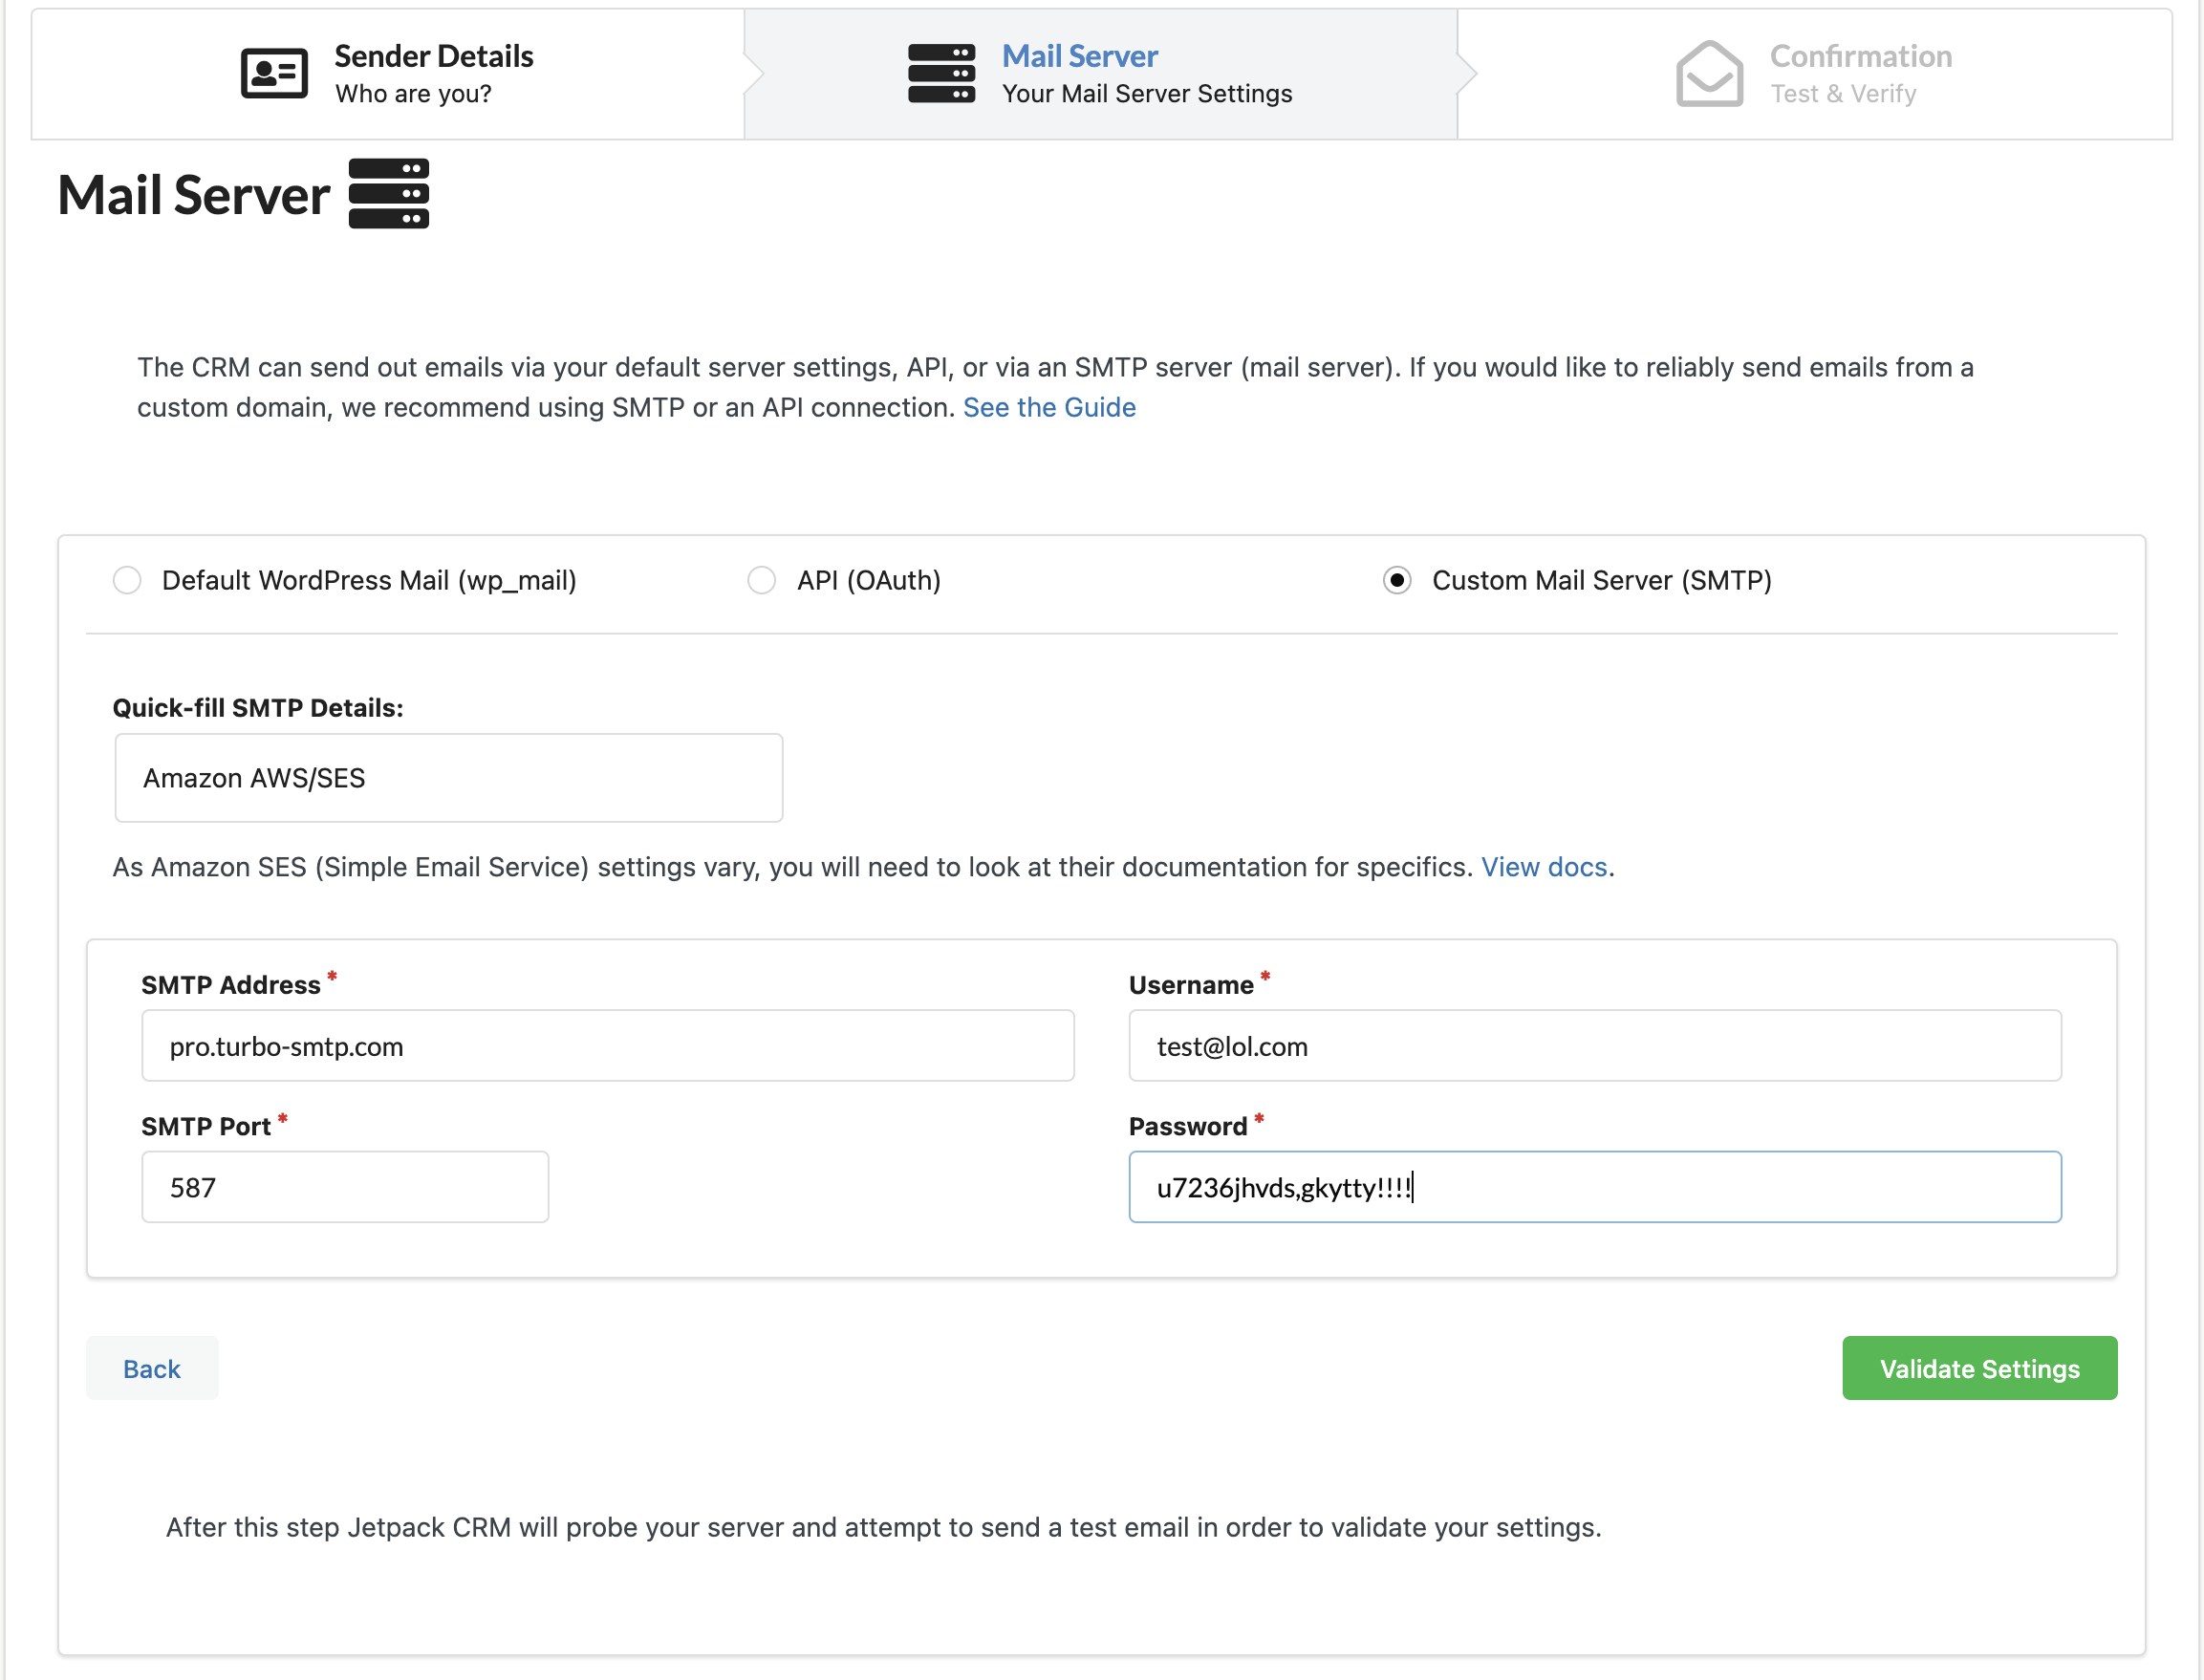
… Hitting Validate settings should then send a test email from this address, and all being well – you should be good to go with this mail delivery method.
If you hit errors when validating, please do read the above notice about ‘Sandboxed accounts’, and make certain the email is verified as per step 1. If issues persist, just let us know via support, after you’ve checked these thoroughly.